Recipes
Chickpea meatballs: photos and videos for a tasty and inviting recipe!
Vegetarian chickpea meatballs are good and delicious legume meatballs, fun to bring to the table on any occasion. Here are all the ways to prepare them!
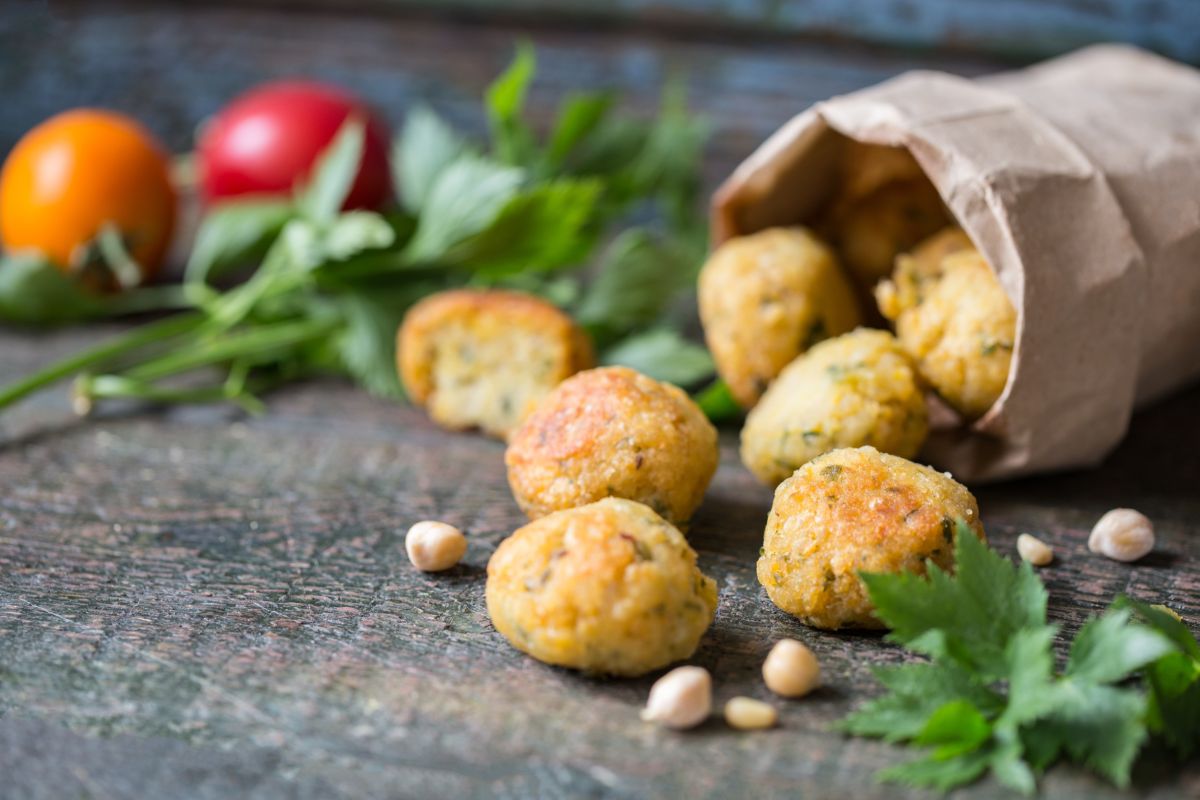
Today we are preparing a truly inviting and tasty dish, but also suitable for those who want to treat themselves to a moment of light pleasure or want to try a delicious vegetarian finger food : chickpea balls. These are small meatballs, which can then be cooked in the oven or fried in a pan. They are fantastic to serve as a second course, but also as an aperitif during a buffet.
The preparation is very simple, and today we will also see the tips for cooking in the oven, for frying and also for a vegan version . Let's go straight to the discovery of this wonderful recipe for baked chickpea balls with photos, steps and video recipe !
How to make chickpea balls in the oven
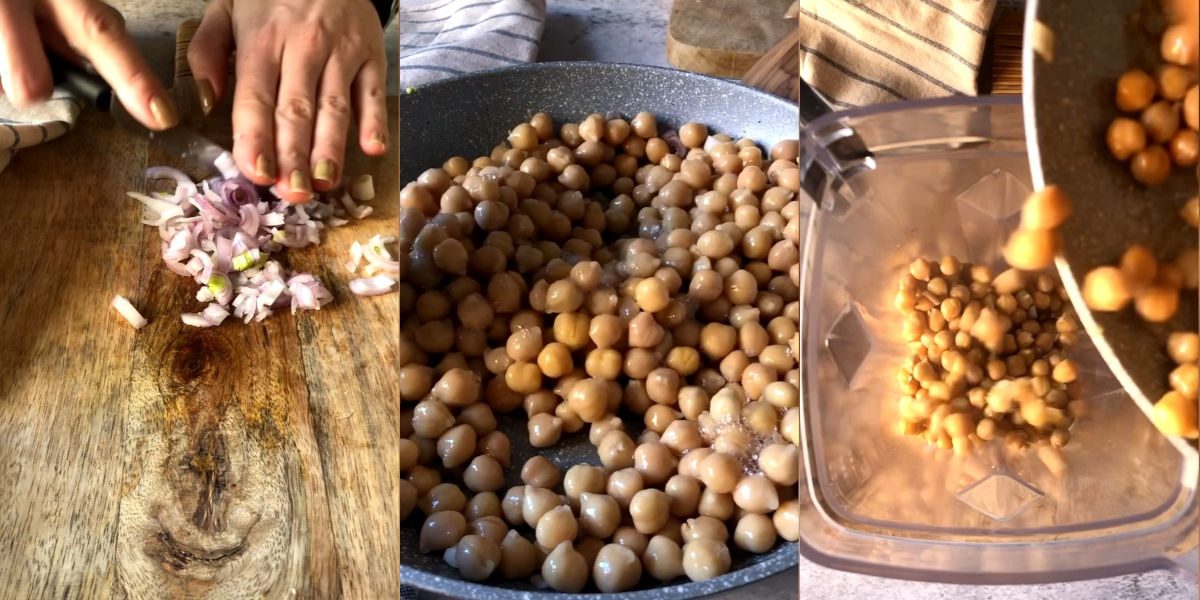
1. First of all, brown the onion in a pan with the chickpeas and a drizzle of oil. A few minutes will be enough, then put everything in the blender until you get a cream.
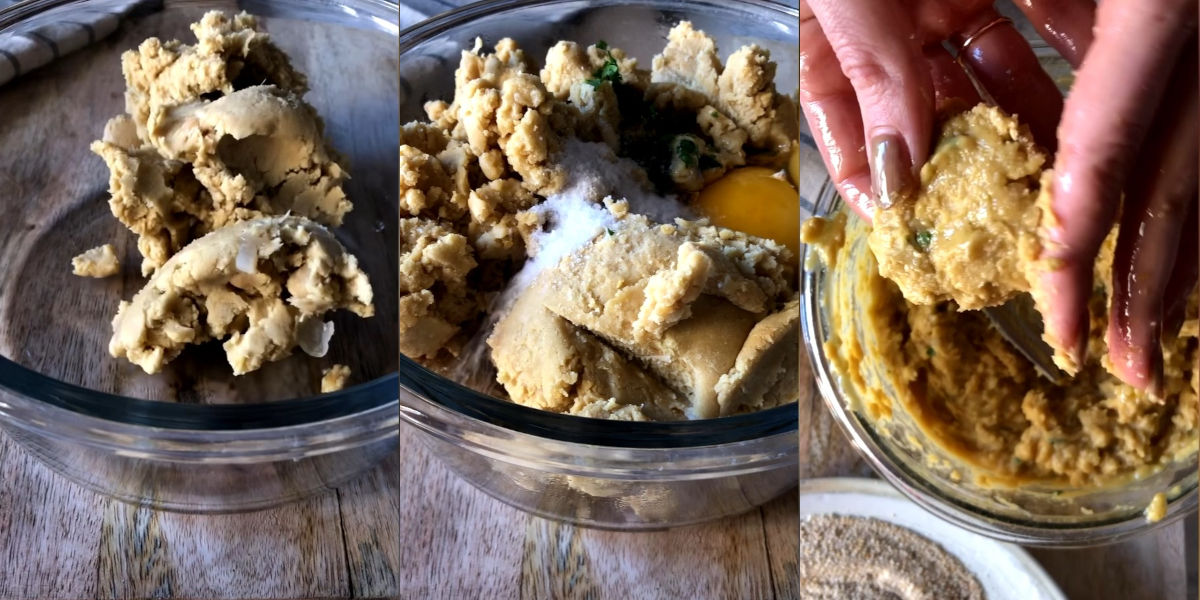
2. At this point add salt, pepper, a drizzle of oil, the eggs, and then the coarsely broken or minced parsley . Finish with a teaspoon of mustard and then, after mixing everything, start forming meatballs with your hands.
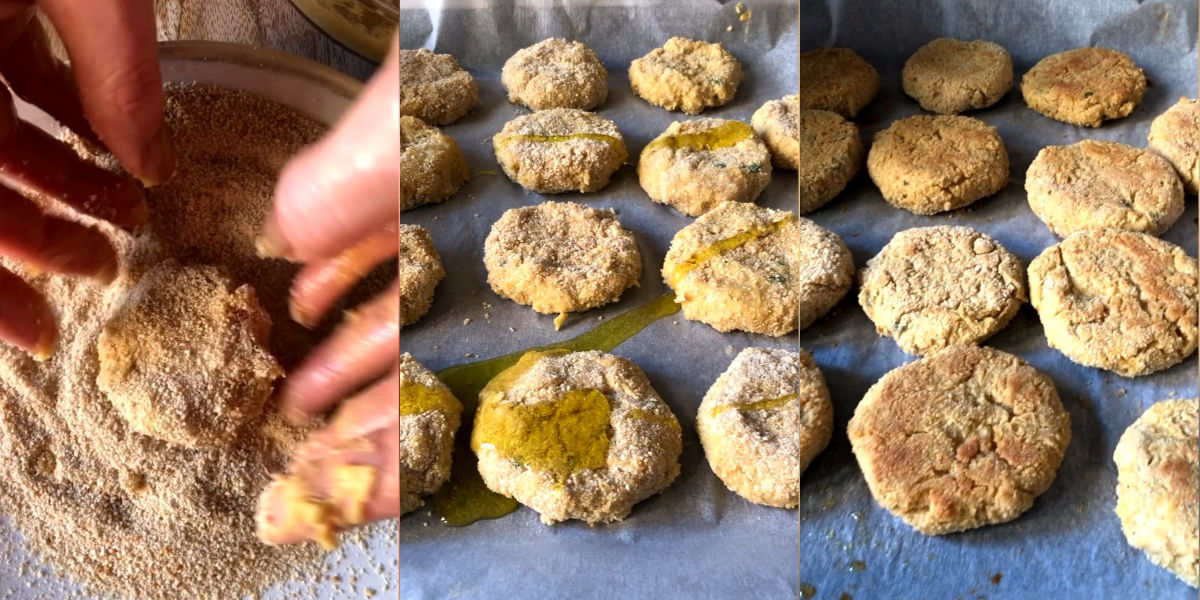
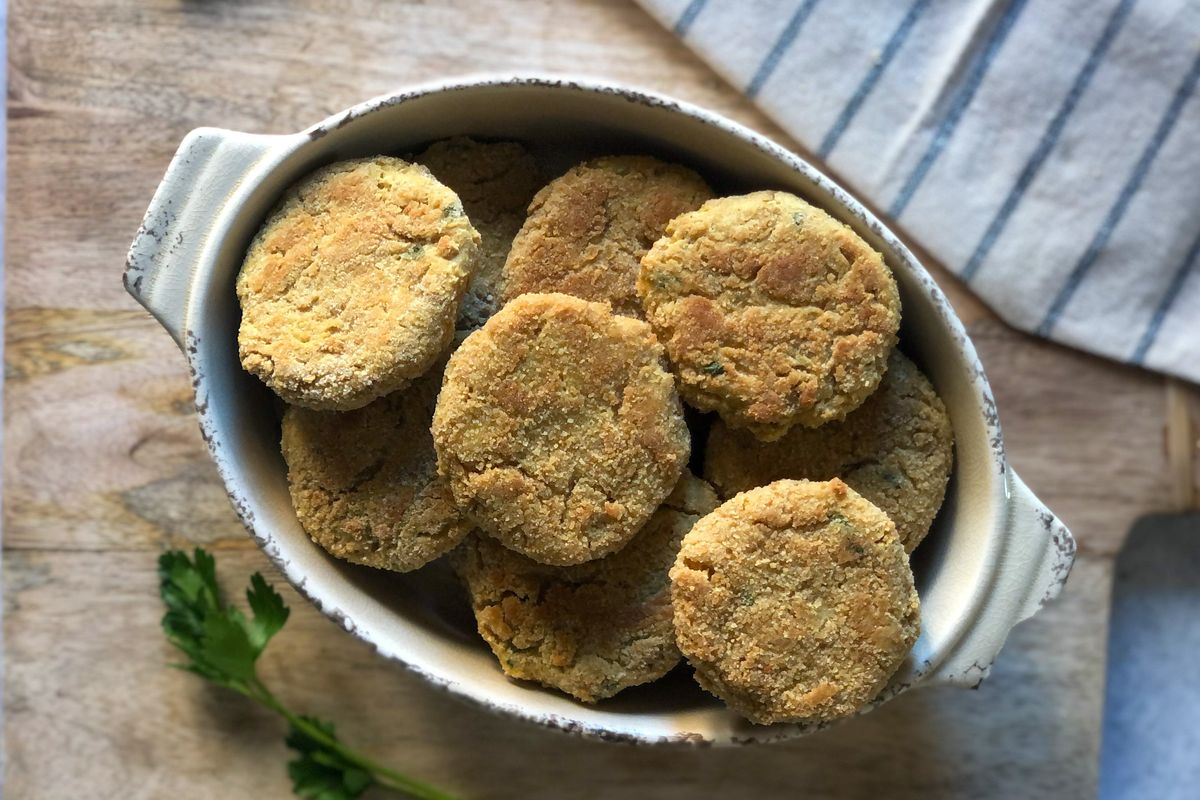
3. Roll them in the breadcrumbs, then preheat the oven and cook them at 180°C for at least 15 minutes, turning them over halfway through cooking . The chickpea balls are ready, enjoy your meal!
To make the recipe tastier, you can add a few spoonfuls of grated cheese to the dough, but be careful with the final mixture which must not be too savoury. If you love this preparation, try all our meatball recipes too!
Read also
Do you want chickpeas? Here are 10 must-try recipes
Preparation of fried chickpea balls
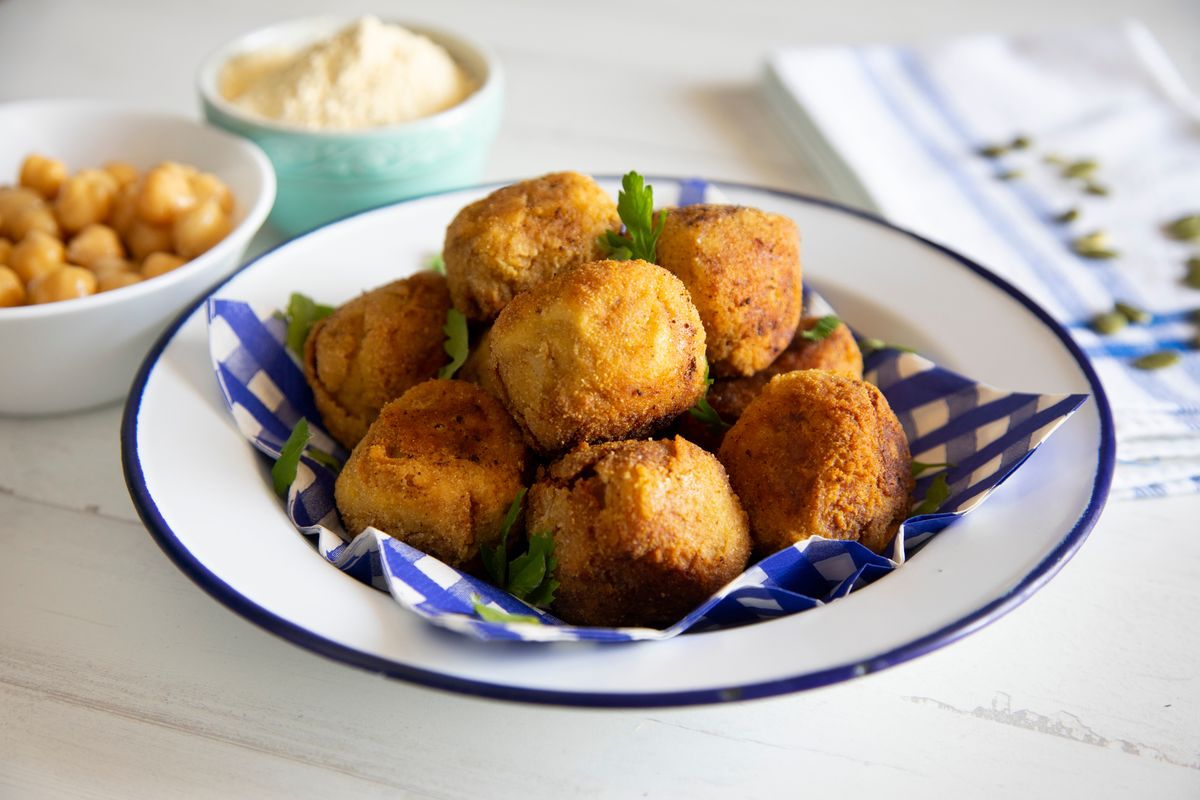
- For a more delicious version you can also fry them. The preparation (up to the moment of cooking) is the same: brown the onion and cook the chickpeas in a pan with a drizzle of oil.
- Blend everything and add salt, pepper, a drizzle of oil, eggs, parsley and a teaspoon of mustard .
- With your hands, give the mixture the shape of meatballs and dip them in a pan with already hot oil.
- After about 5 minutes in boiling oil they should be golden brown : drain them with a slotted spoon and place them on a sheet of absorbent paper.
Vegan chickpea balls and another variation
If you think eggless chickpea balls aren't good, you're right. Yes, because they are delicious !
In short, if you want to enjoy light and tasty baked vegetable balls, but also 100% VEG, all you have to do is remove the egg from the dough and follow the instructions listed above:
- Brown chickpeas and onions, blend and add the various condiments. If, however, there is a need for a more solid mixture, you can add a slice of sandwich bread or stale bread.
- Dip the bread in the water to soften it, then insert it into small pieces in the dough and blend. You will see, the texture will be firmer, and the taste will be really good too! At this point, all you have to do is continue with the steps of the main recipe.
Otherwise, for a result that is also perfect for those who follow a gluten-free diet, you can make chickpea and potato balls: just boil the latter and then mash them into the dough . In addition to giving texture, they will also balance the flavor thanks to their sweetness!
If you liked these meatballs, also try thechickpea burger : it will be like preparing a huge chickpea meatball full of flavor and which you can also enjoy between two slices of bread: yum !
storage
We recommend consuming these delicious canned chickpea balls within 2-3 days , you can keep them in the refrigerator in a container with an airtight lid. We do not recommend freezing in the freezer.
Riproduzione riservata © - WT


Discover the secrets of blood tests: when, why, and how to get them in Monza
Understanding the optimal timing and comprehensive nature of blood tests: A guide for residents and workers in Monza looking to...


Discover the secret ingredient for healthier hair: why everyone is talking about tea tree oil
The growing popularity of natural solutions for body and hair care highlights the versatility of tea tree oil in enhancing...


Discover the 2026 home design trend that’s redefining comfort and serenity
The shift to a more curated and calming home design that prioritizes human well-being over aesthetics is taking center stage...


The surprising rise of intimate aesthetic medicine: What you need to know about male enhancement trends
The rapid expansion of intimate aesthetic medicine: How innovative treatments are revolutionizing the landscape of contemporary healthcare by focusing on...


Discover the surprising rise of intimate aesthetic medicine for men
The rapid expansion of intimate aesthetic medicine in modern healthcare and its implications for psychological and physical well-being. Intimate aesthetic...