Recipes
What is autolysis, a fundamental phase of the bread-making process

Autolysis is a pre-dough that makes leavened products lighter and more digestible as well as easier to work with. Here's everything you should know.
Approaching bread making might seem really complicated: difficult terms follow one another together with particular techniques and flours of all kinds, discouraging most people. Whether it is bread or pizza, the preparation almost always starts from the autolysis process which consists of mixing the flour with a part of the water and then letting everything rest for a period of time varying from 20 minutes to 24 hours. However, not everyone is clear about the reason for this step and this is why we thought we would shed some light on the topic.
Dough with autolysis: what is it
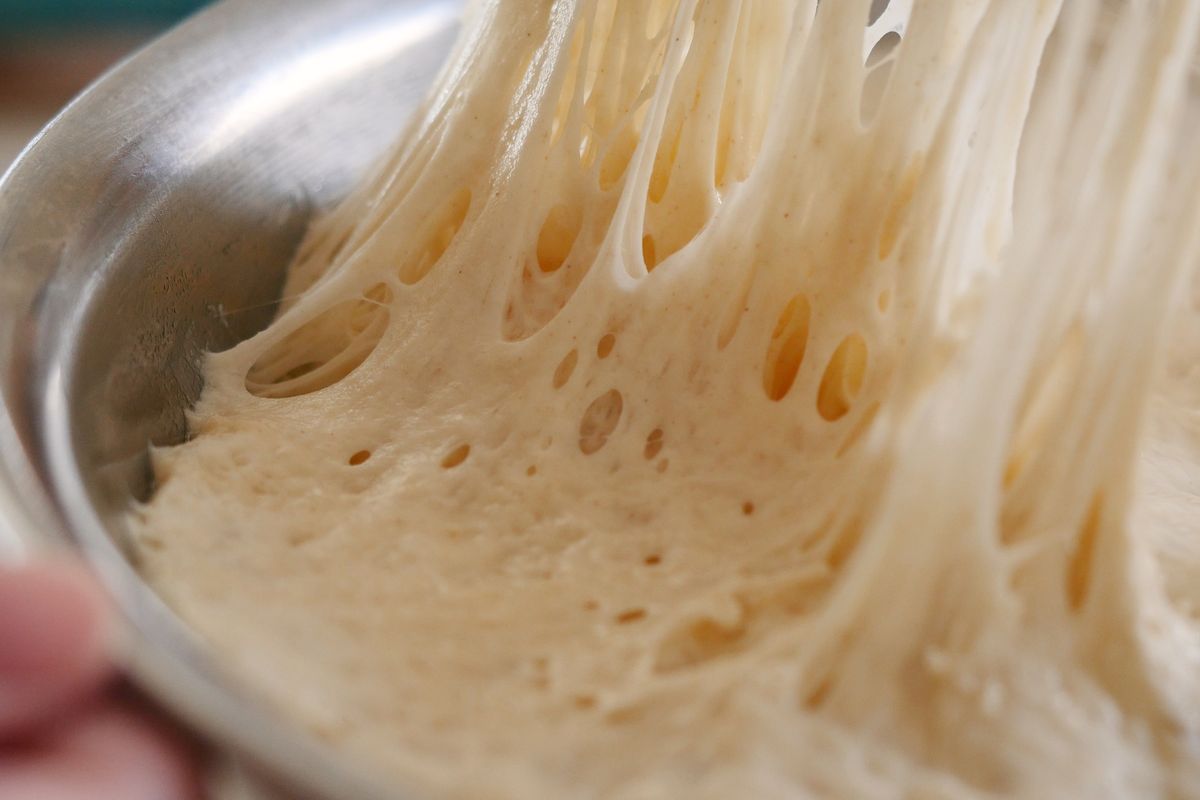
The autolysis process serves to break down the cells of the flour, demolishing the proteins, promoting the release of sugars and thus facilitating the formation of gluten. This technique was introduced some time ago because the soft wheats present in Italy were too weak to resist bread making. It was therefore essential to adopt pre-mixing techniques, such as autolysis or biga, to favor the absorption, structure and, consequently, lightness of the finished product.
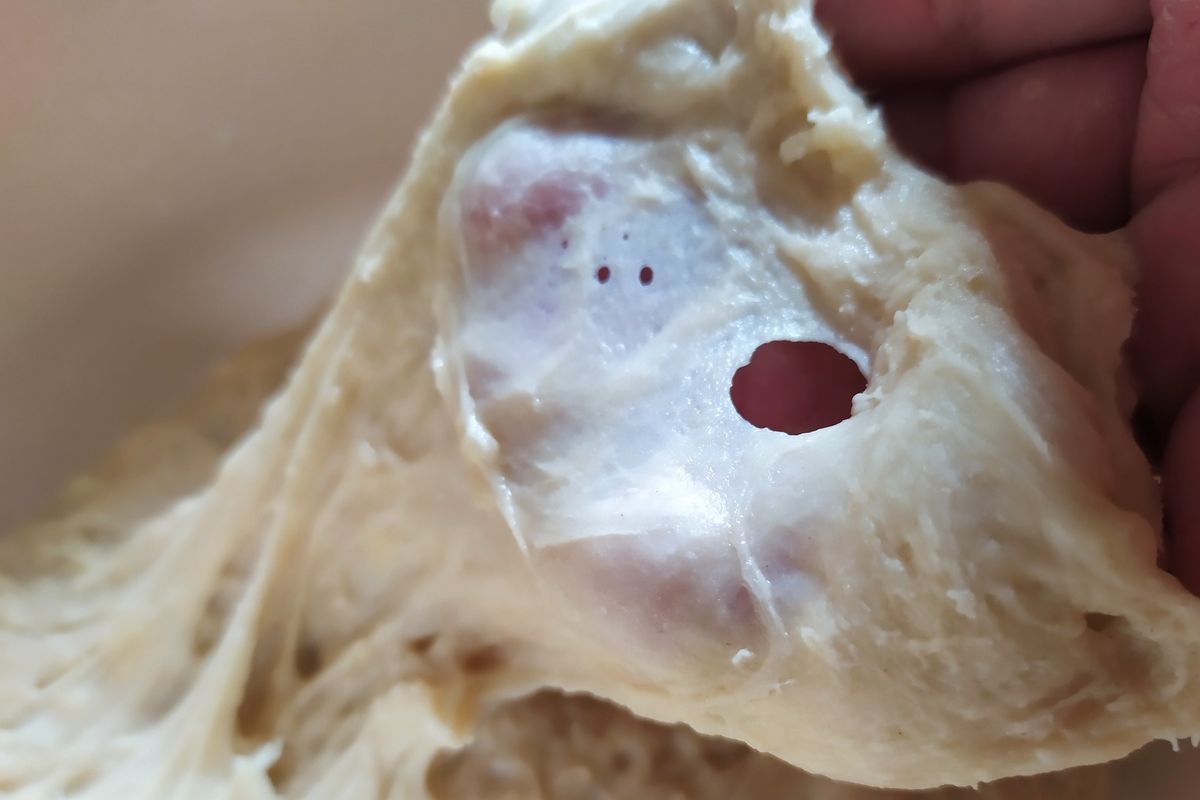
This technique therefore allows you to obtain a gluten mesh that is stronger and more resistant to leavening.
Currently, given the wide variety of flours available on the market, the usefulness of such approaches appears to be redundant. It is superfluous to resort to pre-mixtures and pre-ferments, since the quality of the raw materials allows high absorption percentages to be obtained without the need for further aid.
How to do autolysis
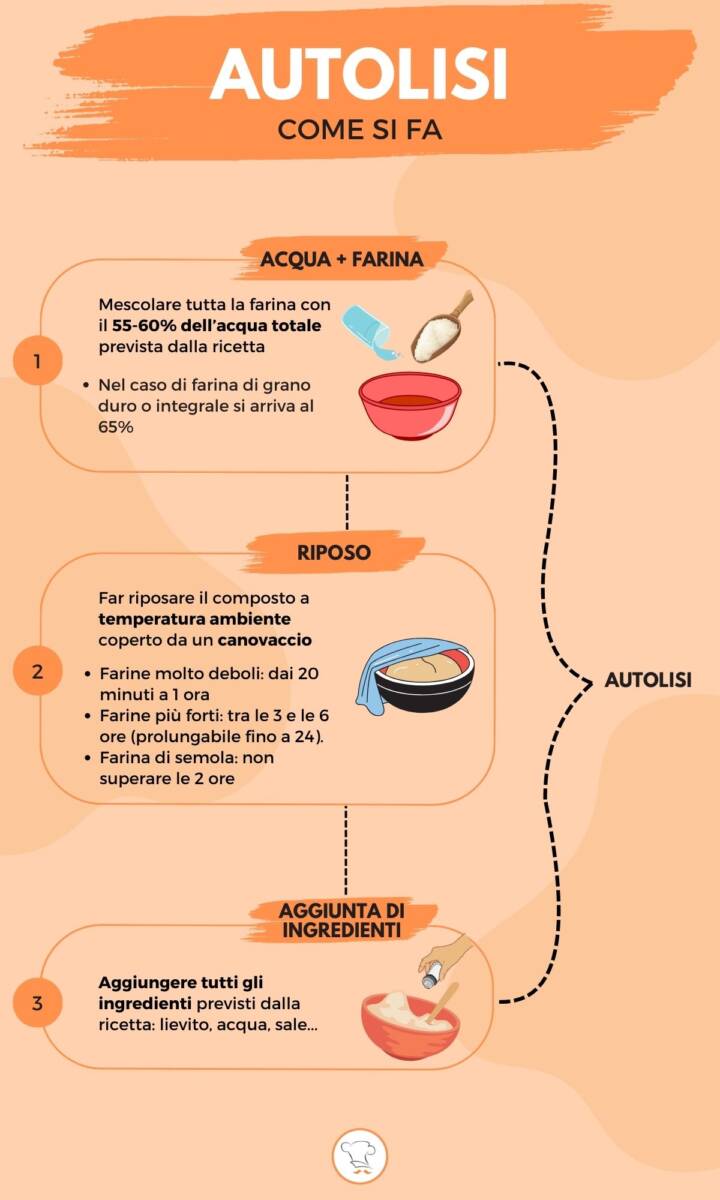
There are still many cases in which autolysing helps the dough to better develop its gluten network. For this reason it is essential to know how to carry it out, in its three distinct phases.
– The first phase involves the union between water and flour. To prepare the dough by autolysis it is necessary to mix all the flour with 55-60% of the total water required by the recipe (it reaches 65% if we are talking about durum or whole wheat flour).
– The mixture must then be left to rest for a period of time varying from 20 minutes to 24 hours depending on the flour used: very weak flours must be left to autolyse for a short time (from 20 minutes to 1 hour), stronger flours instead for a period between 3 and 6 hours but can be extended up to 24. In the case of semolina flour, however, it is always better not to exceed 2 hours. The autolysis dough should then be kept at room temperature, covered with a damp cloth to avoid excessive evaporation of the water contained in it.
A prolonged autolysis period, exceeding 24 hours , could generate an imbalance in the fermentation. This would happen because the yeast would have an excess of sugars available to use, compromising the formation of a more robust gluten structure.
– We then proceed with the final dough . In fact, once the rest has finished, all the other ingredients required by the recipe are added: in general the yeast, the remaining water, salt etc.
Bread with autolysis
The autolysis technique is used above all when preparing bread and pizza because it allows you to obtain a dough that is easier to work with and much more digestible . We recommend carrying out this step only if you decide to use strong or medium-strong flours.
The autolysis technique in bread precedes the actual kneading phase. To implement it, mix the flour called for in the recipe with 55-60% water. Let it rest then add all the other ingredients required by the recipe, finishing kneading. For autolyzed bread you will need:
- 300 g of type 1 flour
- 200 g of 00 flour (w 270)
- 340 ml of water
- 2 g of dry brewer's yeast
- 10 g of salt
- 1 teaspoon of malt
Mix the two flours with 180 ml of water and leave to rest for 30 minutes (in this case the flours used have a medium strength , for this reason you will not need much resting time). Then add the remaining water, the yeast and the malt and knead with the planetary mixer for 10 minutes, adding the salt only at the end. Proceed with 3 rounds of folds 15 minutes apart from each other, bringing the edge of the dough towards the center, then cover with cling film and place in the refrigerator for 24 hours . Bring it back to room temperature for 30 minutes, shape it into a loaf and after 2 hours of leavening, cook it by placing it inside a cast iron pan at 250°C for 50 minutes.
Pizza with autolysis
Autolysis in pizza has the same function and follows the same methods . It should be made before the actual dough and helps to make it lighter and more digestible. For autolysis pizza you will need:
- 500 g of Manitoba flour
- 320 ml of water
- 2 g of salt
- 7 g of fresh brewer's yeast
- 30 g of extra virgin olive oil
Mix the flour with half the water and let everything rest for 1 hour and 20 minutes/2 hours (we are in fact talking about strong flour). Then add the remaining water in which you have dissolved the yeast, the oil and finally the salt. Proceed with a round of three folds and leave the resulting dough to rise in the oven with the light on for 6 hours . Then roll out the dough, dividing it into two pans, let it rise for an hour, then fill it and cook at 250°C for 10-12 minutes.
In short, autolysis is a pre-dough similar to biga . We encourage you to try both of these techniques to find out which is best for you.
Riproduzione riservata © - WT


Discover the secrets of blood tests: when, why, and how to get them in Monza
Understanding the optimal timing and comprehensive nature of blood tests: A guide for residents and workers in Monza looking to...


Discover the secret ingredient for healthier hair: why everyone is talking about tea tree oil
The growing popularity of natural solutions for body and hair care highlights the versatility of tea tree oil in enhancing...


Discover the 2026 home design trend that’s redefining comfort and serenity
The shift to a more curated and calming home design that prioritizes human well-being over aesthetics is taking center stage...


The surprising rise of intimate aesthetic medicine: What you need to know about male enhancement trends
The rapid expansion of intimate aesthetic medicine: How innovative treatments are revolutionizing the landscape of contemporary healthcare by focusing on...


Discover the surprising rise of intimate aesthetic medicine for men
The rapid expansion of intimate aesthetic medicine in modern healthcare and its implications for psychological and physical well-being. Intimate aesthetic...